
How to install BlueStacks, How to install and root Bluestacks? Rooting Bluestacks 5, How to root Bluestacks with Bluestacks Tweaker? Easiest way to root Bluestacks, Bluestacks offline installer.
How to Install and Root BlueStacks
Do you wish to use your computer like an Android tablet? Yea, you heard it right. You can use Android operating system on your computer like a tablet. Also, you can play almost all of the Android games and use applications. All you need is a simple program. Its name is Bluestacks. We can say that Bluestacks is the best virtual Android device. Additionally, you can root it after installing Bluestacks. In this article, we will explain how to install and root Bluestacks.
Installing BlueStacks
There are two ways to install BlueStacks. First way: Install it in the normal way. Download the installer and start it first. Then, it will automatically download other files. The second way is BlueStacks offline installer. You can download all the files through installer. Then, you will not need internet connection afterwards.
- Our suggestion: Download BlueStacks offline installer to your computer.
- Firstly, Its name will show up as BlueStacksFullInstaller_amd64_native.exe
- Then, click on this file and start installation.
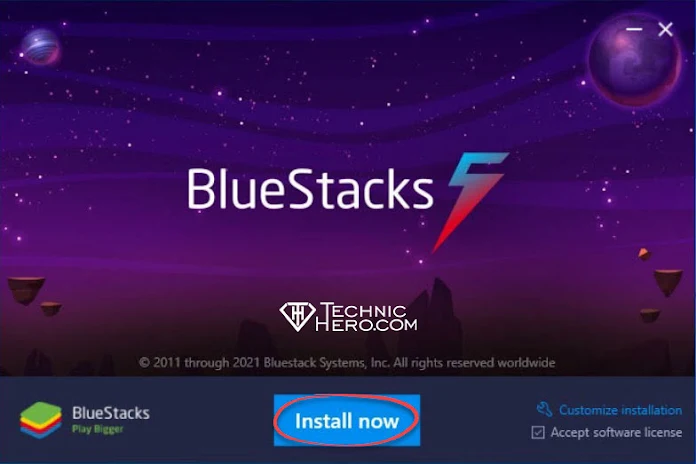
- Tick “Agree Software Licence” button on the bottom right and click on “Install Now”
- Your Antivirus software may cause troubles during the installation process. If it happens, disable it for a while.
- You will see “Completed” notification when it is finished. Click on this button.
- Lastly, you will see “Login on Google account to start using BlueStacks” notification on launch. You can login on Google account (Suggested). You can just close the software and skip this step to continue with Rooting process.
How to Root BlueStacks?
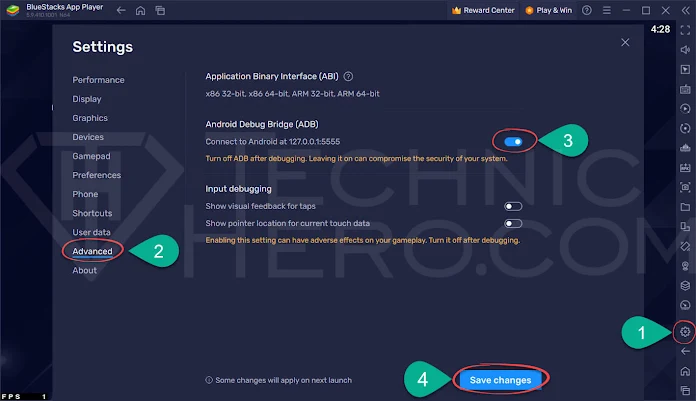
In order to Root BlueStacks, you must first turn on Android Debugging. For this:
- If BlueStacks is closed, open it. Then click the Settings icon on the right.
- Click “Advanced” on the left side of the window that opens.
- Then enable the “Android Debug Bridge (ADB)” option.
- Finally, click the “Save changes” button.
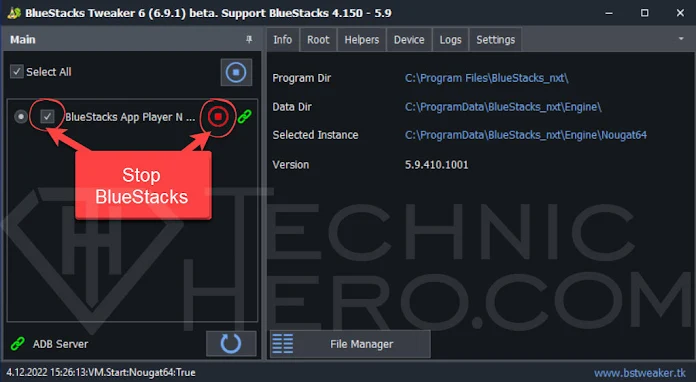
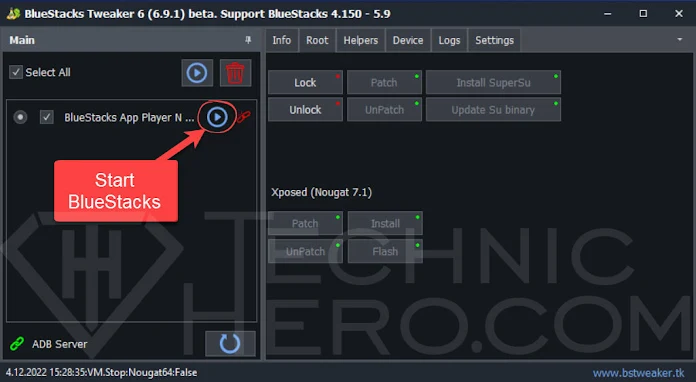
Step 1 We will use the BlueStacks Tweaker tool for the BlueStacks Root process. First download the BlueStacks Tweaker 6 from here. Extract the downloaded archive to your desktop. Run the BlueStacksTweaker.exe file inside the folder you extracted. You will see a screen like the image below. Here, check the Bluestacks option and click the stop button next to it.
Step 2 Then switch to the “Root” tab of the program at the top of BlueStacks Tweaker. When BlueStacks is closed, the “Unlock” button will be active. Click the “Unlock” button here.
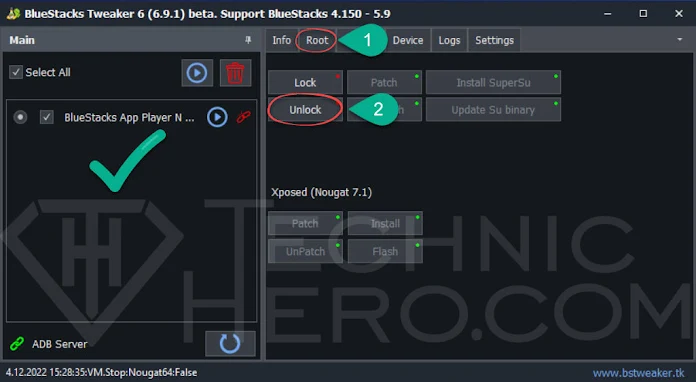
Step 3 When BlueStacks is closed, the “Unlock” button will be active. We broke it, now it’s time to install Root. BlueStacks must be turned on for this. Press the Start button on the left panel of the program or manually start BlueStacks.
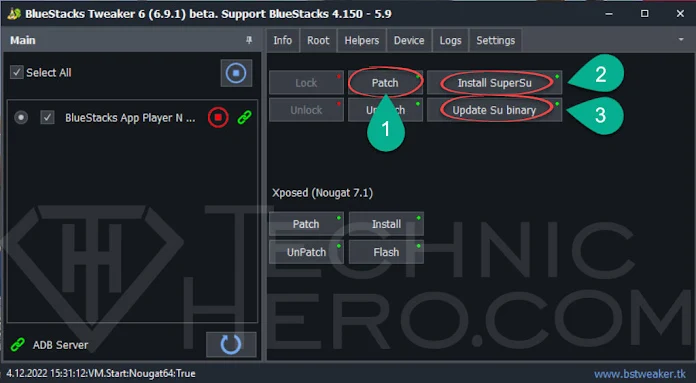
Step 4 When BlueStacks is open, Patch and Root buttons will be active. Then, while in the Root tab of the Tweaker program, click the Patch, Install SuperSu, Update Su Binary buttons on the right side, respectively.
Final We Rooted BlueStacks and made it Premimum. We are out of business with BlueStacksTweaker anymore. You can check if your BlueStacks is rooted.
IF SU code needs to be updated. Continue? You will receive a message. Press the Continue and Normal buttons respectively. Upload successful! It is recommended to restart your device. a warning comes. Click the Restart button and restart BlueStacks. Congratulations Root process finished.


")
