
Windows 11 Local Account Setup, Windows 11 installation without internet, installing windows 11 without Microsoft account. Windows 11 let’s connect you to a network jump
Contents
Windows 11 Local Account Setup Without Microsoft Account
With the 22H2 release, Windows 11 removed the local account setup after the format. Instead, it brought the obligation to setup with a microsoft account. In the past, when the computer had no internet connection, there were options such as “I don’t have an internet connection” and “Continue with limited installation”. Thanks to these options, we were able to create a local account without internet. However, with the 22H2 version, your computer must now be connected to the internet. And also the obligation to log in with a microsoft account came. We do not know if Microsoft will give up this imposition in the future versions, but there is a way to install without an internet connection, of course, let’s move on to the narration.
Method 1: Installation of Windows 11 without Internet
- While on the “Let’s connect you to a network” screen, which is the last stage of the installation, press the Shift + F10 keys together from the keyboard.
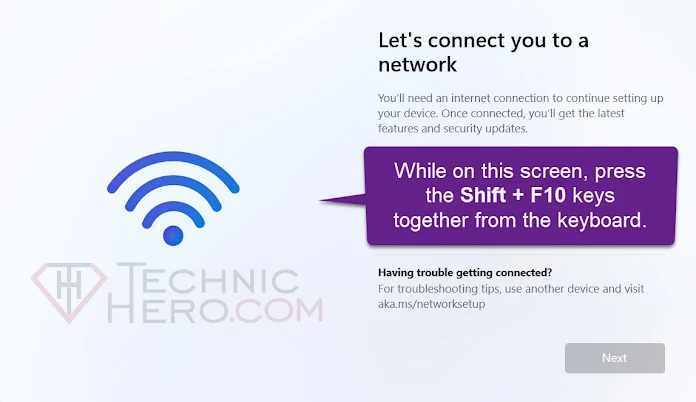
- Then enter the command “oobe\bypassnro” in the black window that opens and press the “ENTER” key on the keyboard.
oobe\bypassnro

After this command, the computer will reboot itself. “I have no internet connection” after the computer restarts. And then you will see “continue limited installation” options. You can now complete the Windows 11 installation by creating a local account. Good work…
Method 2: Bypass setup with Microsoft Account (internet required)
In this method, in order to bypass the Microsoft account, the computer must be connected to the Internet at startup. No internet connection is required after the local account is set up.
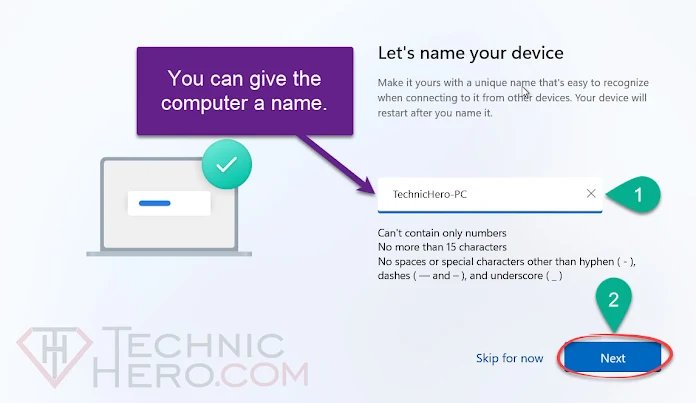
- After connecting the computer to the internet, it will ask you to give the computer name as follows. Let’s continue after you give the computer name you want.
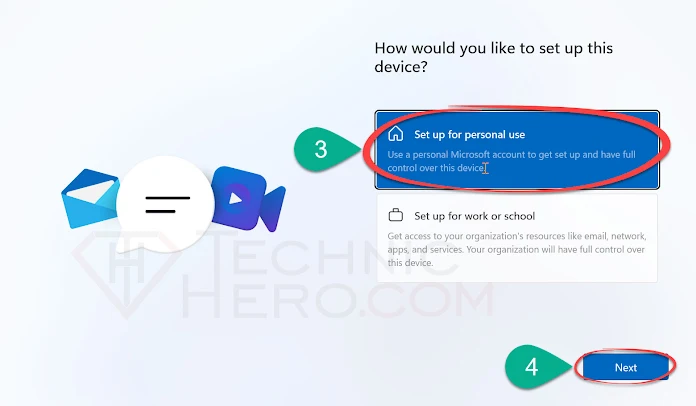
- On the next screen, select “Setup for personal use” and click “Next” to continue.
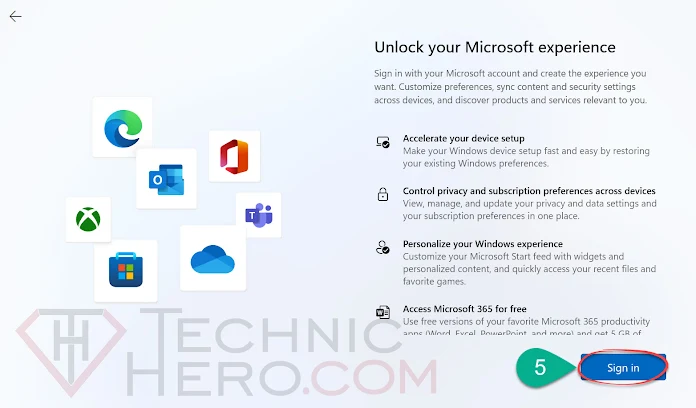
- Continue by clicking the “Login” button on the next screen.
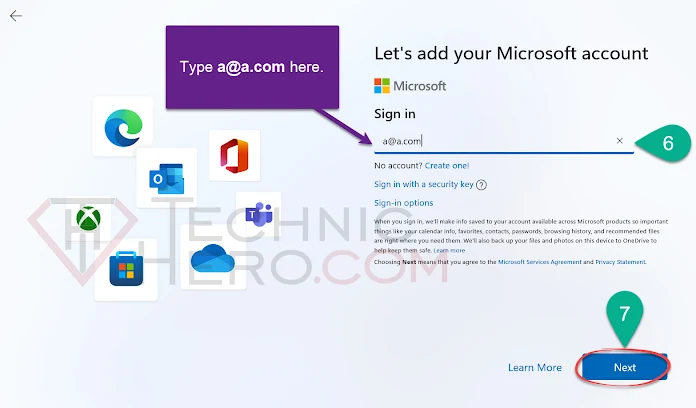
- Enter “a@a.com” as the account on the login screen and click the “Next” button.
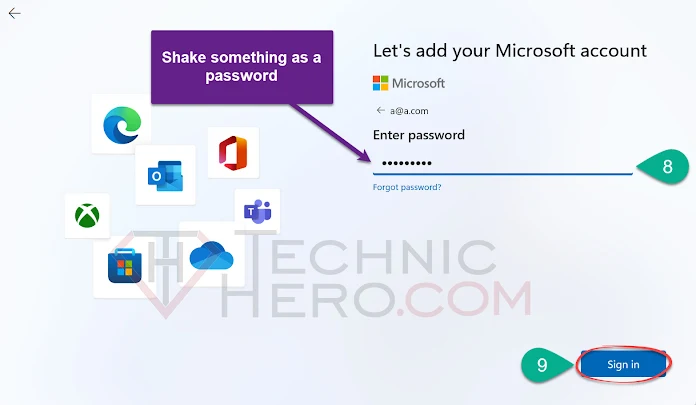
- Enter something random as the password. It doesn’t matter here. Then continue by saying “Sign in”.
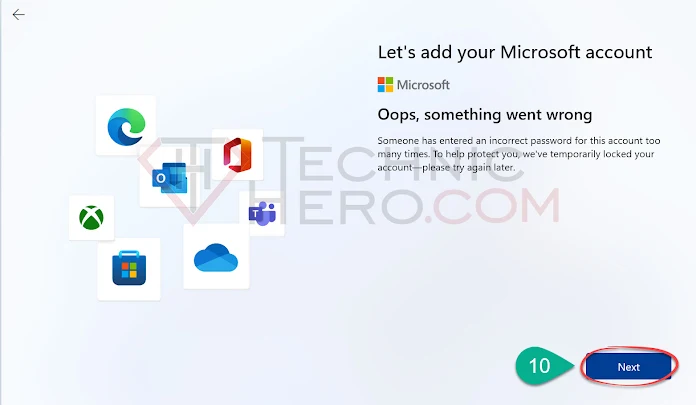
- You will get the “Oops, something went wrong” error. This is good for us. Continue by clicking the “Next” button.
- Happy ending: You can now enter your Local account name. Continue by clicking the “Next” button after entering your local account name.
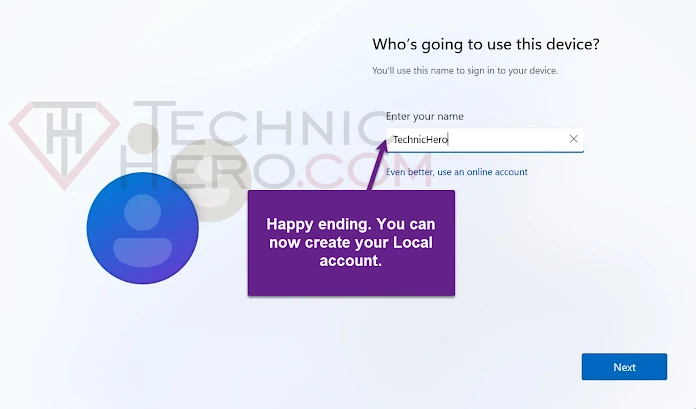
- No internet required from here on out. You can now complete the installation.
Method 3: Opening Local Account after setup with Microsoft Account
Let’s say you have completed the setup by signing in with your Microsoft account, but you want to switch to a local account. You can create a local user account for this. We have previously prepared a topic for creating a local account in Windows 11, here you can refer to Adding a How To Add New User Account to Windows 11?.


")
