
Xiaomi Redmi Note 10 Pro Install TWRP, Root Redmi Note 10 Pro sweet. How to Root Redmi Note 10 Pro? Root and install TWRP on Bootloader unlocked Redmi Note 10 Pro devices.
These processes work only on devices with unlocked Bootloader. Bootloader unlock support is officially provided by Xiaomi. If you have a Redmi Note 10 Pro model and you have not unlocked your bootloader, you can unlock your Bootloader by going to the relevant topic from the link below.
> Click here to Unlock Redmi Note 10 Pro Bootloader
WARNING: There is a slight risk of crash due to interference with the bootloader and recovery of the phone. remember to back up the information on your phone (Contacts, Applications, Internal Storage) before starting this process. If you follow these procedures, you assume full responsibility.
Contents
Redmi Note 10 Pro Phone Preparation
Preparation 1: Open developer options
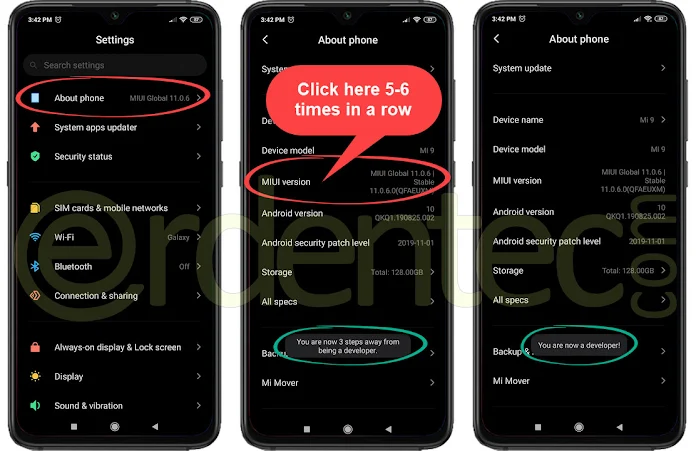
- To open the developer menu is hidden, go to Settings > About phone.
- Press “MIUI version” 5-6 times in a row.
- After pressing the MIUI version 5-6 times, “You are now a developer” will be displayed.
Preparation 2: Turn on OEM lock and USB Debugging
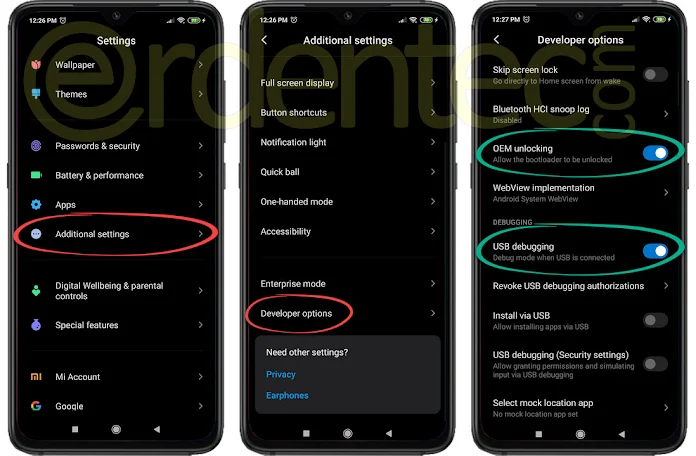
- To unlocking: Go to Settings > Additional settings > Developer options.
- Enable the “OEM unlocking” and “USB debugging” options here.
Step 1: Install TWRP on Redmi Note 10 Pro
Required tools:
 adb-setup.exe > Download (download and install on computer)
TWRP.img > Download = (Rename it to twrp.img and put it in the Local Disk C:/adb folder)
Magisk.zip > Download (Download and paste the updated Magisk.zip file to internal storage)
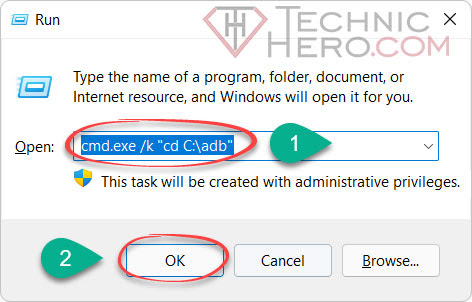
- First, press
 Win + R together on the keyboard. In the Run window that opens, type the following code, and then press ENTER.
1 | cmd.exe /k "cd C:\adb" |
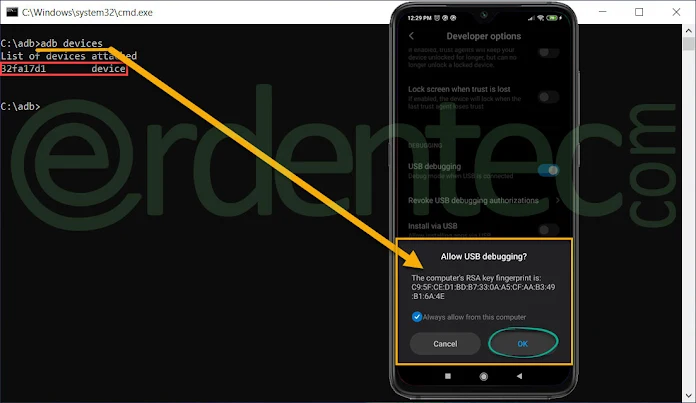
- When the black screen window opens, connect the phone to the computer with the screen open and type the following “adb devices” code and press ENTER. on the screen of the phone says “Allow USB Debugging?” a warning will come; Check the Always allow this computer check box and press “OK”.
adb devices
- Then, to get our phone into fastboot mode: Type the following “adb reboot bootloader” code on the black cmd screen and press “ENTER” on the keyboard.
adb reboot bootloader
- After entering the code above and entering the keyboard, the device will enter fastboot mode. Then type the following “fastboot flash recovery twrp.img” code and press ENTER. This is the code that will install TWRP.
fastboot flash recovery twrp.img

- TWRP Installation is finished. Now we have to boot the phone in TWRP mode. Remember, TWRP was installed, but it was not more permanent. If the Phone starts normally without installing the Magisk file, TWRP will be deleted. Now to boot the phone in TWRP Mode: Enter the following “fastboot reboot recovery” code on the black screen and press ENTER.
fastboot reboot recovery
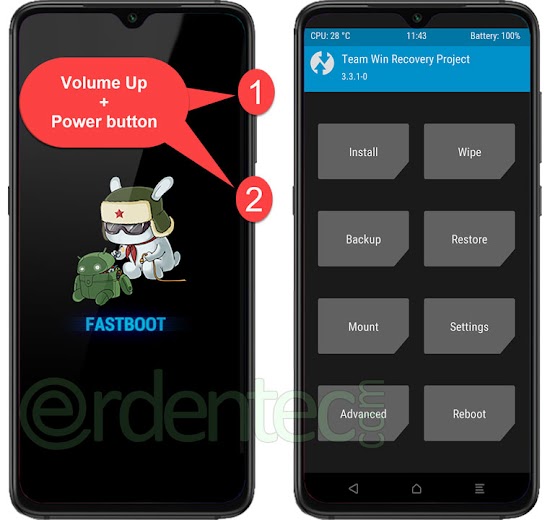
Or to manually boot into TWRP Mode: Unplug the phone from USB as described in the image above and press and hold the Volume Up + Power key until the phone shuts down and vibrates. Release the keys after vibration.
After TWRP Mode is opened, we can proceed to the Root stages.
Step 2: Redmi Note 10 Pro Root
- If the phone is encrypted when TWRP is opened, enter your password and open it. Then click the “Install” button in TWRP. Then find and click the “Magisk.zip” file that you have dumped to the internal storage. Finally, upload the file by dragging the “Three Arrow Button” to the right.

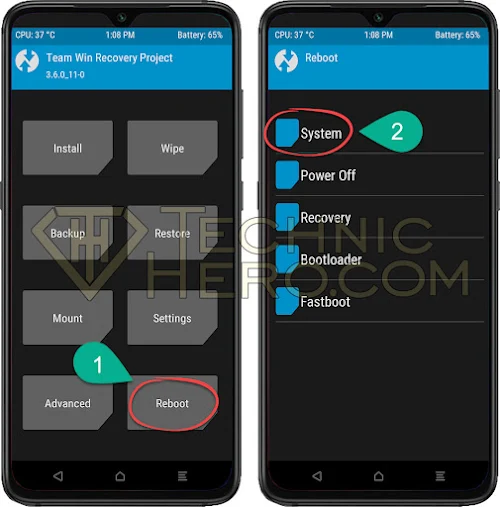
- Now press the Middle key to the TWRP main screen and then tap Reboot > System. This will open your rooted phone.
Final: Finally, when the phone boots up, you will see that there is Magisk Manager among the Applications. This application is the application that manages root permissions.


")
